
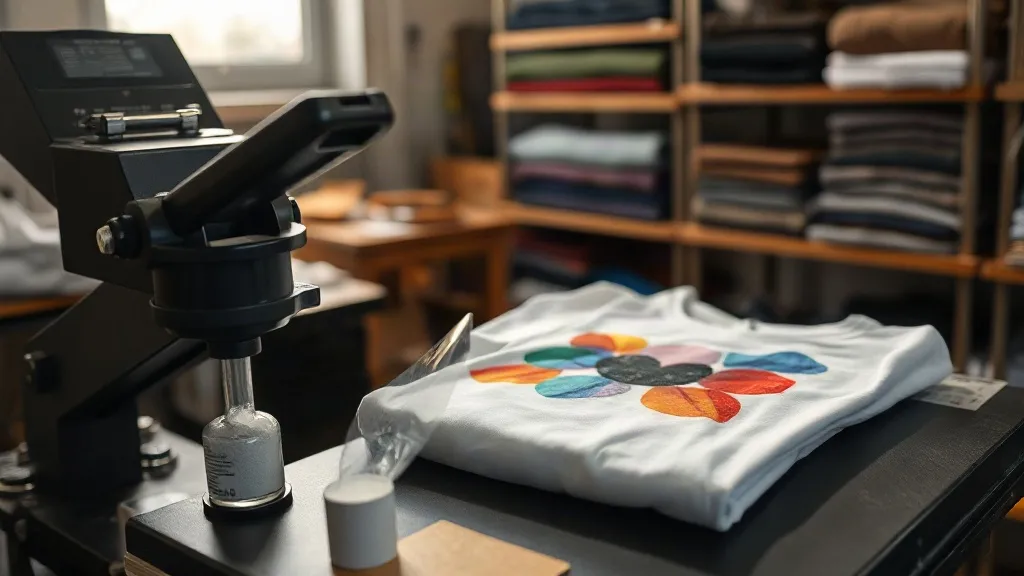
Walk into any small print shop today and you will probably spot a heat press with a stack of film sheets next to it. That stack is usually dtf film, and it has quietly become the workhorse of the decorated apparel world. Unlike vinyl cutting or screen printing, dtf transfers let you print full-color, photographic artwork on a desktop setup, then press it onto cotton, poly blends, canvas totes, and even some nylon jackets without changing your entire workflow. This guide is written for the shop owner who already owns a press and a printer, or is about to buy one, and wants to skip the expensive trial-and-error phase.
What DTF Actually Is (and What It Is Not)
Direct-to-film printing works like this. A specialized inkjet printer lays down CMYK plus white ink onto a PET film coated with a release layer. While the ink is still wet, a powdered hot-melt adhesive is sprinkled over the print. The sheet goes through a curing oven or a heat source to melt the powder into a flexible glue layer. What you end up holding is a transfer: a thin, stretchy, full-color decal backed with adhesive.
It is not the same as DTG, which prints directly onto the garment and needs pretreatment. It is not sublimation either, because sublimation only bonds to polyester and fades on cotton. And it is not vinyl, which requires weeding and limits you to one color per layer. The practical difference is freedom: dtf transfers handle gradients, tiny text, and multi-color logos in a single pass, and they work on fabric blends that would ruin a sublimation job.
Where DTF Fits in a Real Shop
Most shops I have visited use DTF for three things. First, small runs of one to fifty pieces where screen printing setup costs do not make sense. Second, personalization jobs with names, numbers, or photos. Third, restocks of a design that was originally screen printed, where the original screens are gone and rebuilding them would cost more than the order is worth. If your shop does any of those, DTF is not a trend. It is a tool.
Choosing Film and Powder Without Guessing
The two consumables that decide your quality are the film and the adhesive powder. Film comes in cold-peel and hot-peel versions, in single-sided and double-sided coatings, and in thicknesses usually described in microns. Powder comes in fine, medium, and coarse grinds, with different melt temperatures.
- Cold-peel film: Wait for the sheet to cool completely before peeling. This gives the sharpest edges and is my default for detailed artwork and small text.
- Hot-peel film: Peel while still warm. Faster turnaround, but fine details can stretch if you rush the pull.
- Fine powder: Best for thin lines and halftones. Less adhesive overall, so it suits smooth fabrics.
- Medium powder: The all-rounder. Good bond on cotton and blends without feeling stiff.
- Coarse powder: For stretchy or heavily textured fabrics where you need more glue to grab the fibers.
A common mistake is buying the cheapest film on the market and blaming the printer for poor results. Bad film releases inconsistently, leaving patches of ink behind or transferring a visible film ghost onto the shirt. If your prints look dull or feel plasticky, swap the film before you touch a single printer setting.
Powder Application: Less Is More
You want an even, light coating, not a snowstorm. Shake the sheet gently, then tap off the excess. If powder clumps in humid weather, store it in an airtight container with a silica packet. Over-powdered transfers feel rubbery, crack at the edges after a few washes, and waste money on every single print.
Press Settings That Actually Work
Every press runs a little differently, so treat the numbers below as a starting point and dial them in with test prints on the exact garment you plan to sell. Record what works. A press log saves more money than any discount code.
- Temperature: 300 to 320°F (150 to 160°C) for most films. Too hot and the film curls or the adhesive burns; too cool and the glue never fully activates.
- Pressure: Medium to firm. You should feel resistance when you close the press, but not so much that the upper platen strains.
- Pre-press: Five to eight seconds on the garment to remove moisture and wrinkles. Skipping this is the number one cause of adhesion failure.
- Press time: Ten to fifteen seconds for the transfer itself, depending on film and fabric.
- Peel: Follow the film's cold-peel or hot-peel instruction. Do not improvise here.
- Post-press: A second five-second press with a cover sheet or parchment improves wash durability noticeably.
If you press the same transfer twice because the first attempt looked light, you are probably fighting a temperature problem, not a time problem. Check the actual platen temperature with an infrared thermometer. Presses lie about their dials more often than owners expect.
Cost Per Print: The Number Most Shops Get Wrong
When people ask whether dtf transfers are profitable, they usually quote only the film and ink cost. That is incomplete. A realistic cost per print includes:
- Film and ink consumed per sheet
- Adhesive powder
- Printer maintenance, printhead cleaning, and eventual replacement
- Electricity for curing and pressing
- Labor for nesting, printing, powdering, curing, and pressing
- Waste from misprints and test pulls
For a typical A4 sheet filled with a medium-sized design, the consumable cost lands in a modest range, but labor is what really moves the needle. Gang multiple designs onto one sheet, print in batches, and cure several sheets at once. A shop that prints one transfer at a time will never compete on price with a shop that fills every square inch of film.
A Quick Pricing Sanity Check
Take a shirt that sells for a retail price in the low twenties. If your all-in transfer cost including labor is a few dollars, you have healthy room for the garment, overhead, and profit. If it is creeping toward half the sale price, fix your nesting and batch sizes before you raise prices. Raising prices to cover sloppy workflow is a slow way to lose customers.
Fabric Compatibility and the Blends Trap
DTF bonds to a huge range of materials, but not all equally. Cotton and cotton-rich blends are the easiest. 50/50 blends are fine. 100% polyester works, though you should lower the press temperature slightly to avoid dye migration on dark colors. Nylon and coated fabrics are possible but need testing, because some coatings repel the adhesive.
Dye migration is worth a dedicated paragraph. On dark polyester, dyes can sublimate upward through the adhesive and tint your white ink pink over time. A low-bleed film or a lower pressing temperature usually solves it. If you sell a lot of performance wear and team jerseys, keep a low-bleed film on the shelf and label it clearly so nobody grabs the wrong roll during a busy week.
Wash Testing: The Only Test That Matters
Do not trust a transfer because it looks good off the press. Wash it. Run three test shirts through five, ten, and twenty home wash cycles, inside out, and inspect for edge lifting, cracking, and color shift. Track the results per fabric and per film. This small habit prevents the worst outcome in this business: a customer returning a shirt you already delivered.
If a transfer fails the wash test, the cause is almost always one of four things. Insufficient pressure, insufficient time, a damp garment, or powder that never fully melted. Work through them in that order. Changing all four variables at once tells you nothing.
Storage and Handling
Cured transfers keep well if you store them flat, away from heat, humidity, and direct sunlight. A simple accordion file organized by design name and film type will save you from digging through loose sheets during a rush order. Label the film type on the back of each transfer, especially if you use both cold-peel and hot-peel in the same shop. The minute saved hunting for the right peel instruction is nothing compared to the shirt you ruin by guessing.
Uncured powder absorbs moisture fast. If you live somewhere humid, cure sheets the same day you powder them. A transfer that sat out overnight in a damp room will press poorly no matter how good your settings are.
Frequently Asked Questions
Can I use a regular inkjet printer for DTF?
No. Standard inkjet printers lack white ink channels and are not built for the pigment inks and film path that DTF requires. You need a dedicated DTF printer with a white ink system, or you need to order transfers from a supplier and press them yourself.
How long do DTF transfers last after washing?
With correct pressing and proper care, a well-made transfer typically survives dozens of home wash cycles without significant cracking or peeling. Washing inside out in cold water and avoiding high dryer heat makes a noticeable difference.
Do DTF transfers work on 100% polyester?
Yes, but dark polyester needs extra care because of dye migration. Use a low-bleed film and press at the lower end of the recommended temperature range. Always wash test before you commit a full order to a new fabric.
What is the difference between hot peel and cold peel film?
Hot peel film is removed while the transfer is still warm, which speeds up production but can stretch fine details. Cold peel film is removed after the sheet cools completely and generally produces sharper edges, making it the better choice for detailed artwork.
Why is my transfer peeling at the edges after a few washes?
Edge lifting almost always traces back to uneven pressure, insufficient press time, moisture in the garment, or powder that did not fully melt. Pre-press the garment, verify your platen temperature, and add a short post-press with a cover sheet.